BrainAccess HALO Setup
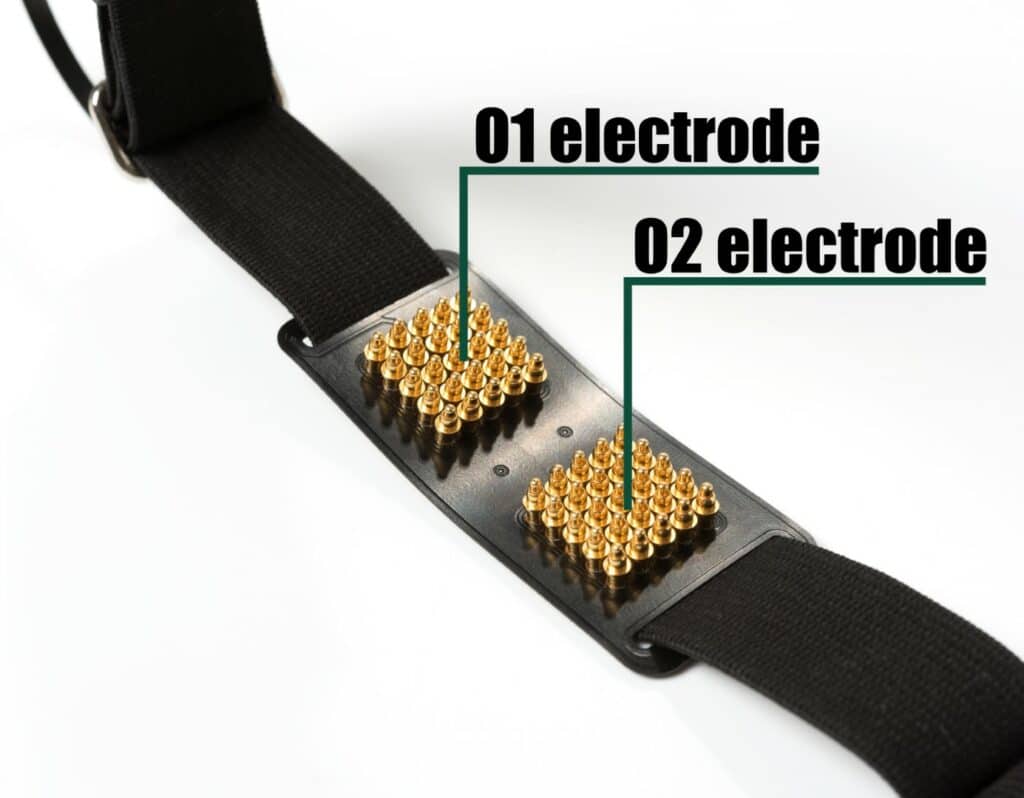
This tutorial goes through the steps required to correctly setup BrainAccess HALO EEG headband for measurements. See the figures below to get acquainted with HALO’s electrode positions.
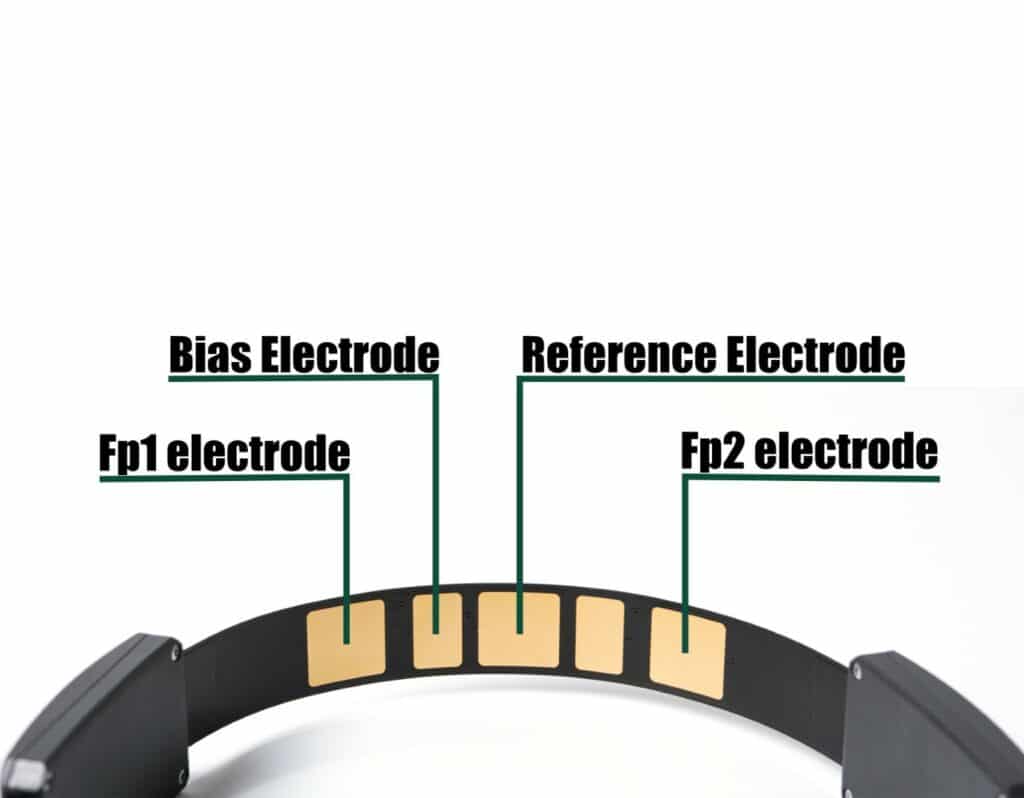
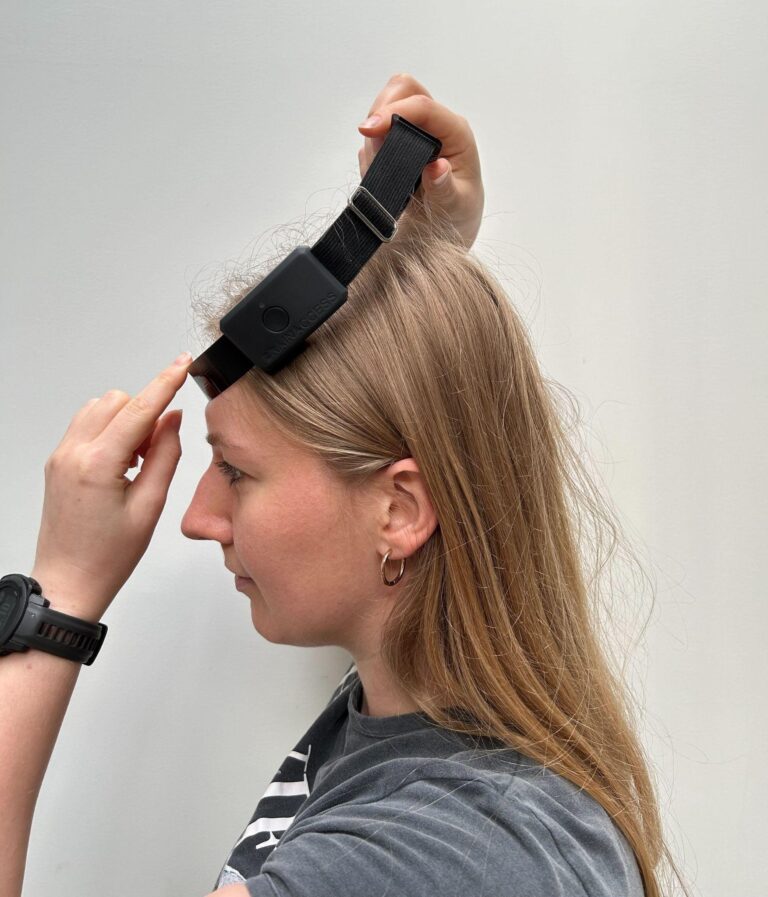
1. Position the frontal part of the band on the forehead. The reference electrode location should roughly coincide with the midpoint of the forehead. Note: the box with the power button should be on the left side of the head.
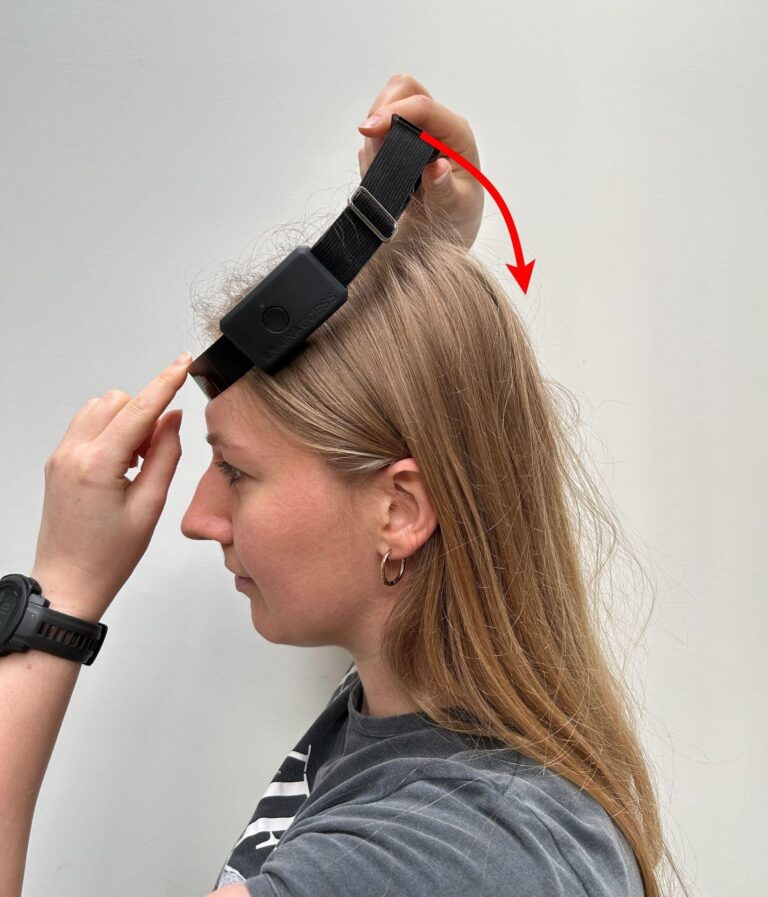
2. Pull back the back part of the headband slightly, lower it down and then release once the back electrodes are over the occipital cortex region. Note: if the band is too tight or too loose, remove the band from the head and adjust the band length using the metal adjustment mechanism before putting it back on.
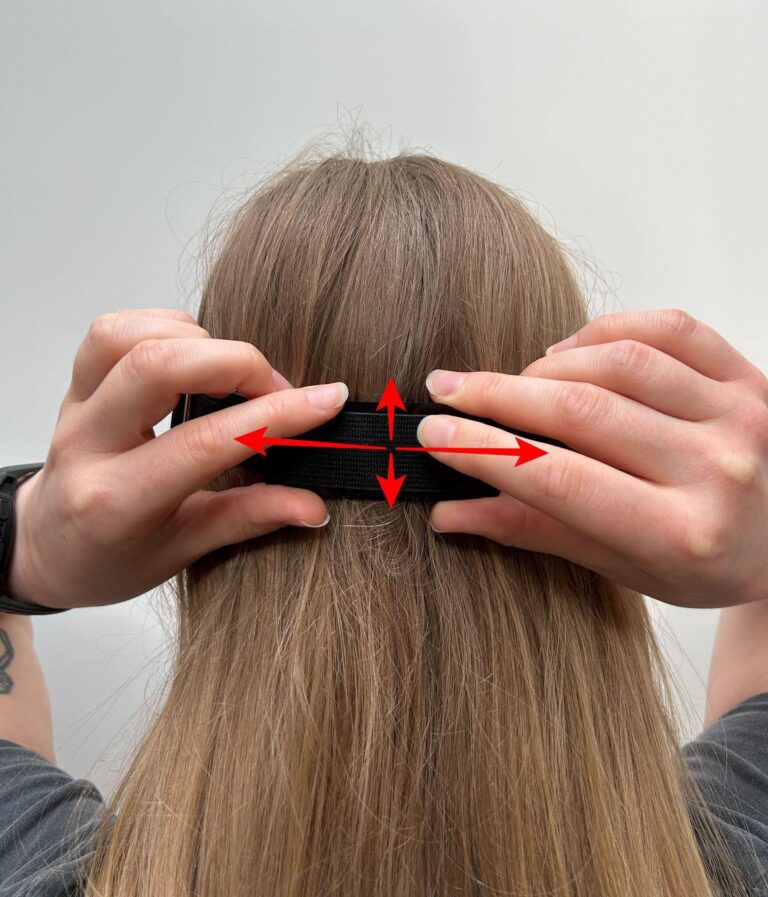
3. Adjust the back electrodes so that they are slightly above the inion and centred laterally.
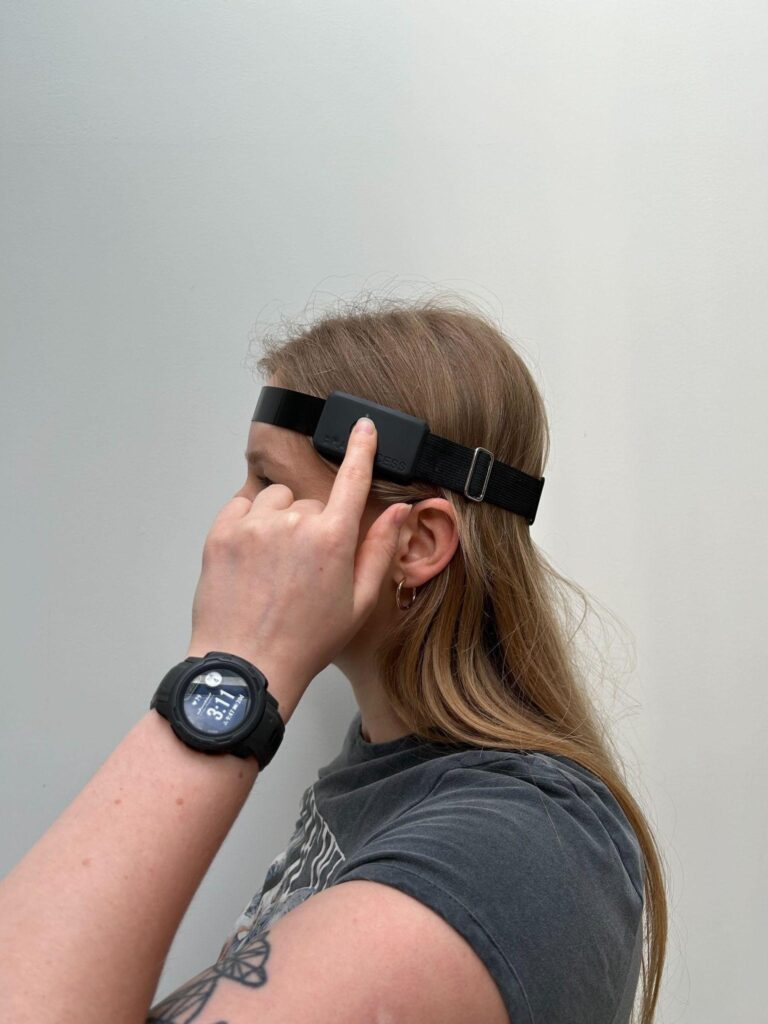
Press and hold the power button for a couple of seconds. Once turned on, it will vibrate and the blue LED will start breathing. Note: If it does not turn on and the red light LED blinks a couple of times meaning that the battery is low, please charge the device first.
If you haven’t done this already, plug in the provided Bluetooth adapter to your computer, the drivers should install automatically. Skip this step if using an integrated or some other installed Bluetooth adapter. You are now ready to connect to your device!
You can use BrainAccess Board software to connect to the device, stream and visualize EEG data. BrainAccess Board can be downloaded from the download centre. Please follow “Starting up with BrainAccess Board” tutorial for more details.
If you are unsure on how to use the device or have further questions – do not hesitate to contact us.
